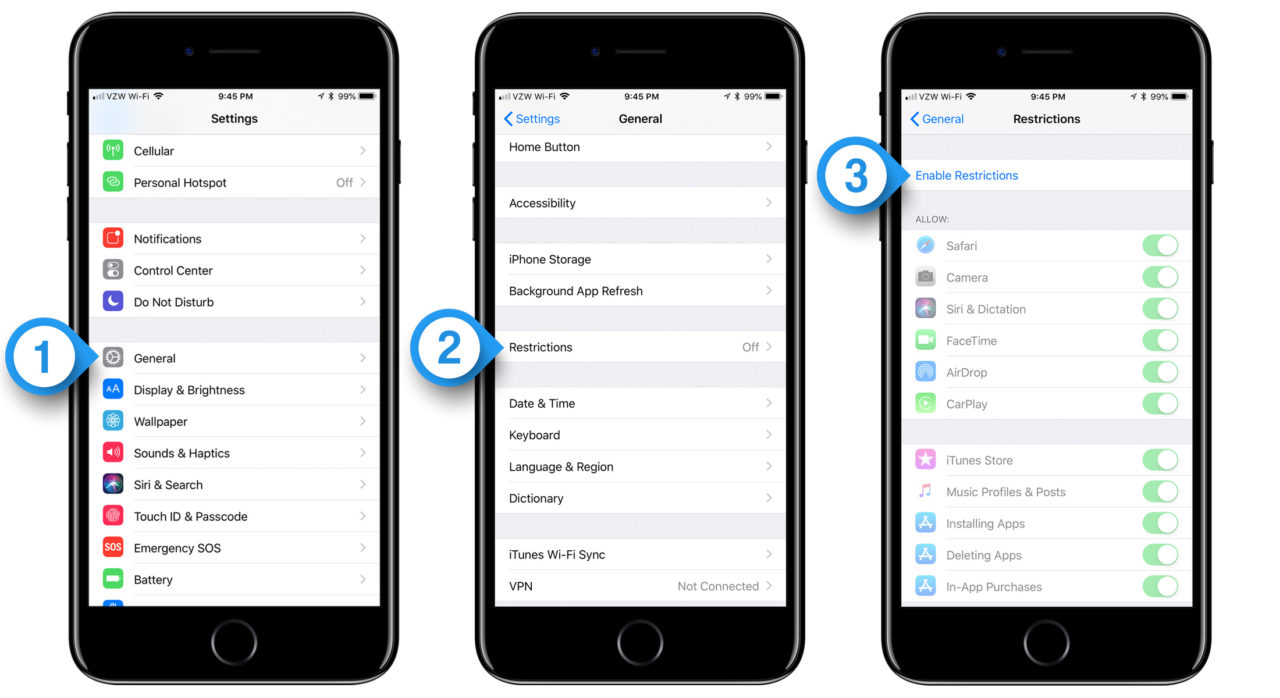
How to Set Parental Controls on iPhone. Apple’s iOS and iPadOS both come with parental controls that allow parents to restrict children’s devices in terms of both content and behavior. The first steps are outlined here for you.
Screen Time is where the majority of the options that restrict content and protect privacy are located. Screen Time is a feature that was introduced in iOS 12 and it keeps track of how much time a person spends on their mobile device.
It is possible to configure it to record and restrict the amount of time spent in individual apps and across specific categories, such as gaming, as well as the amount of alerts that are received.
In addition to this, it comes with blocking options that can be used to restrict app usage or impose restrictions for explicit material and purchases.
How to Set Parental Controls on iPhone 2024
Setting up Screen Time on a child’s device
Parents can set up Screen Time from their child’s device or through Family Sharing.
- Open Settings on the child’s iPhone or iPad.
- Tap Screen Time, select the option to turn it on, and tap Continue.
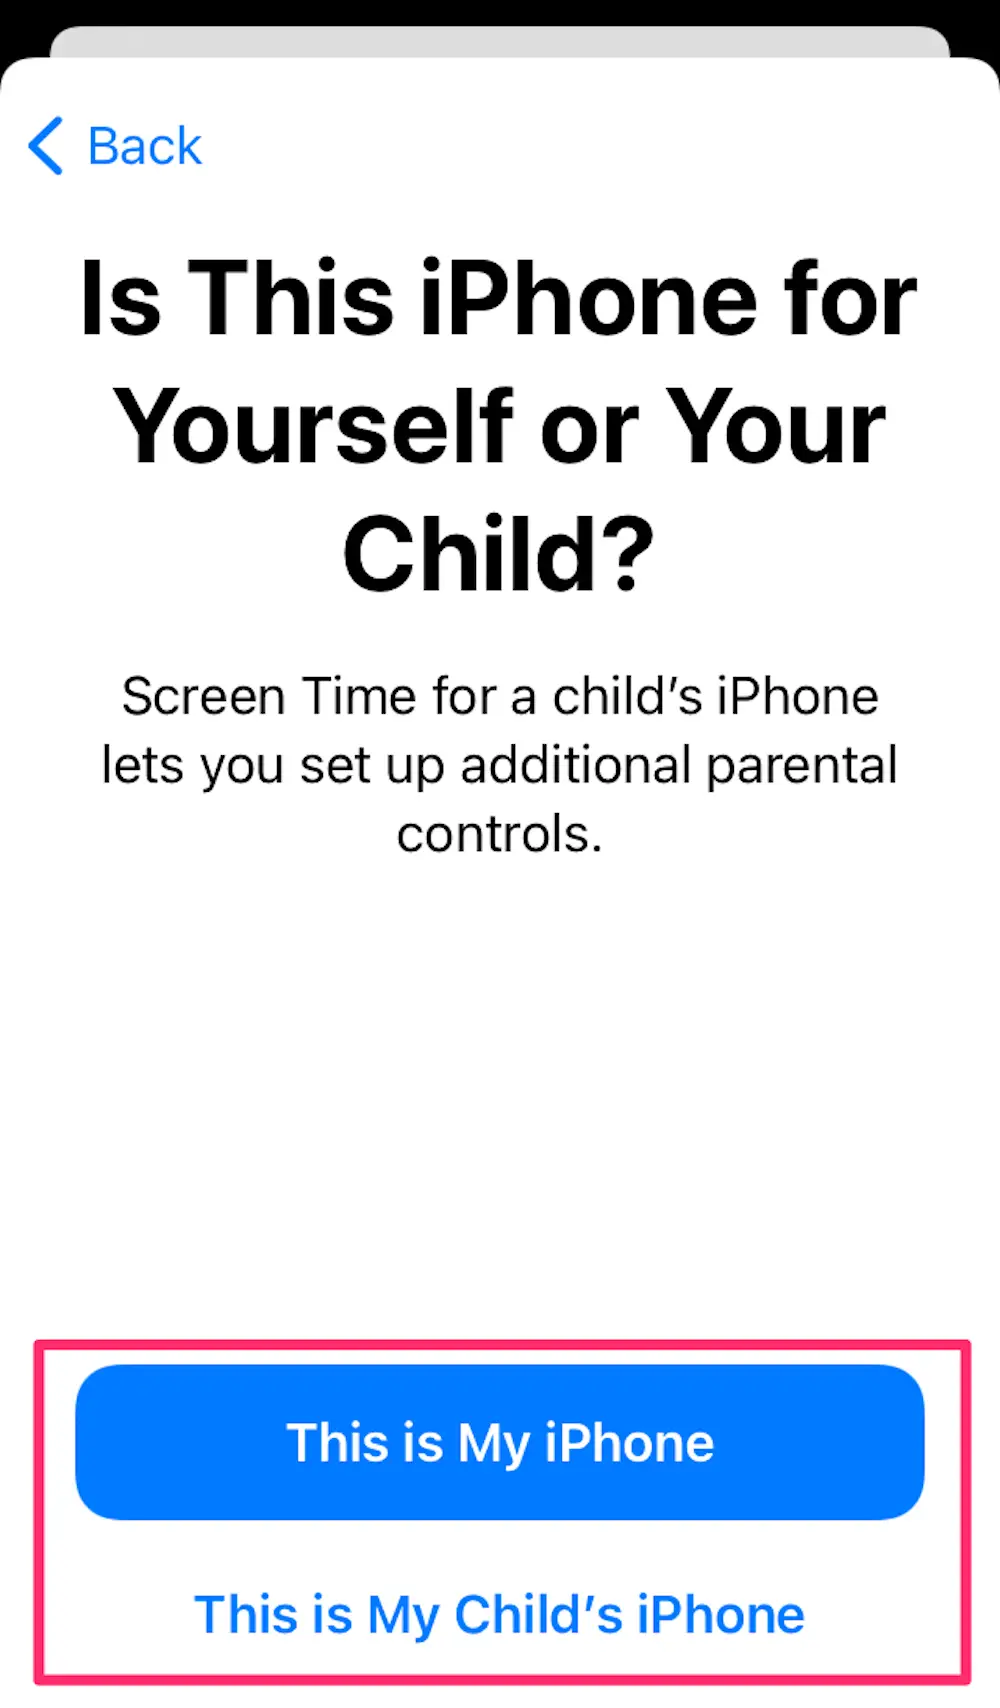
- Choose the This is My Child’s iPhone or iPad option. Users will see a slider to select the child’s age. Options start at five and under, all the way to age 18.
- Under the slider are options for Apps, Books, TV Shows, and Movies. For example, app restrictions mean that only those rated 4+ will appear in the App Store. Scrolling down reveals other options.
- Once the parent fine-tunes the content blocking, tap Turn on Restrictions at the bottom. Or, there is an option to set these up later.
- After that, a screen appears to create a schedule for downtime. For example, a child can’t use the device from 10:00 PM to 7:00 AM.
- Finally, after more limits on the next screen, parents can create a Screen Time passcode to ensure the child can’t change their restrictions.
The method for configuring Screen Time via Family Sharing is the same as the standard method. The feature may be activated by the family organizer by opening Settings on their own smartphone, selecting Screen Time, selecting a child’s name, and then selecting the toggle button.
How to Set Parental Controls on iPhone:
- App Limits
- Open Settings.
- Tap Screen Time.
- Select App Limits.
Here, parents are able to establish time restrictions for individual applications, app categories, and websites.
If you choose a category inside Screen Time like “Games” or “Entertainment,” for example, the limit will be applied to any additional applications of that kind that you download from the App Store in the future.
Set communication boundaries
Once a parent has activated Screen Time for their child, they will have access to even more customization choices by going to the Settings menu and selecting Screen Time.
For instance, selecting the Communication Limits option will put restrictions on who can get in touch with the youngster.
The Phone app, FaceTime, Messages, and iCloud contacts are all subject to these limitations. Communication with well-known numbers associated with emergency services is never prohibited.
The choice of who the child can communicate with during Screen Time or downtime is one of two options available for these constraints.
Only Contacts, Contacts and Groups with at Least One Contact, or Everyone are the three options that can be selected from the drop-down menu.
If the child already has contacts stored in iCloud, they will receive a notification on their device requesting permission to manage those contacts asking for their approval to do so.
They will not receive a notice if they do not have contacts, and the parent has the option to begin adding contacts at any time if they so choose.
When a person whose contact with the child is restricted by the Communication Limit settings makes an attempt to reach the child via Phone, FaceTime, or Messages, the communication will not go through.
The same thing happens if the youngster tries to call or send a message to a person whose contact information has been blocked by the settings; the recipient’s name or number will appear in red with a clock icon next to it, and the communication will not go through.
These material limitations can be altered at any time by the child’s parents, even as the child matures and gains more independence and responsibility.
The Family Sharing organizer is provided with a checklist that contains reminders to keep the parental control settings up to date as the child grows older.
Content & Privacy Restrictions
The ability to make in-app purchases, download content from iTunes, or install and uninstall apps is something that parents have the ability to restrict for their children.
- Open Settings and tap Screen Time.
- Tap Content & Privacy Restrictions, and enter the passcode if the system asks.
- Turn on the toggle for Content & Privacy Restrictions if it’s not already on.
- Select iTunes & App Store Purchases, and choose Allow or Don’t Allow for various settings here.
Another setting under Content & Privacy Restrictions is Allowed Apps. Parents can disable various built-in apps and features such as AirDrop, SharePlay, Wallet, and more.
Content restrictions to disallow installing or deleting apps, in-app purchases, and more
Next, below Allowed Apps is a menu item called Content Restrictions. The setting lets parents prevent kids from accessing explicit content within Music, Podcasts, News, and Fitness. Other settings can disable music videos, only allow apps for specific age groups, limit adult websites in Safari, and more.
Scrolling down through the Content & Privacy Restrictions area reveals options to allow or disallow various privacy and system settings, such as changes to the passcode, location services, and other options.
Restrict Your Child From Certain Websites
The instructions that are provided below will show you how to prevent your child from accessing specific websites.
Automatically restricting access to adult websites is possible with this setting; in addition, you have the option of adding websites to a list of those that are “always allowed” or “never allowed.”
There is an additional option for a more restrictive allow list, in which the websites on the list are the only ones that your child is permitted to see.
- Go to the Screen Time Settings Menu
- Go to “settings” and tap “screen time.”
- Go to the Content & Privacy Restrictions Menu
- Tap on “content & privacy restrictions” and enter your screen time passcode if prompted.
- Go to the Content Restrictions Settings
- Tap the toggle button to turn on content and privacy restrictions, then tap “content restrictions.”
- Go to “Web Content”
- Choose the Restrictions You Want to Set
From here, you can choose “unrestricted access,” “limit adult websites” or “allowed websites only.”
How to Prevent Purchases and Downloads on Your Child’s Device
There are two different approaches you may take to stop your child from downloading and installing apps or making illicit in-app purchases on a mobile device.
The first is managed through the settings for the amount of time spent looking at the device. Your child will either be able to install apps, delete apps, and make in-app purchases, or they will not be able to do any of those things.
The second choice gives your child the ability to submit a request for permission before downloading or purchasing an application. In order to do so, you will need to have Apple’s family sharing function activated on your device.
You may keep track of purchases and downloads by enabling the “ask to buy” option if you have set up the family sharing feature and your payment method is shared with members of your family, both of which are required.
By utilizing this function, a request to either download or make a purchase is communicated to the family organizer (whoever set up the family sharing group).
After that, the request can be remotely accepted by the organizer, or it can be declined using their own device. In order to make advantage of the “ask to buy” feature, there must be at least one child in your family sharing group who is under the age of 18 years old.
- Go to Screen Time Settings
Go to “settings” and tap on “screen time.”
- Go to Content & Privacy Restrictions
Tap “content & privacy restrictions” and enter your screen time passcode if prompted.
- Go to the iTunes & App Store Purchases
Make sure the “content & privacy restrictions” toggle button is turned on. Tap “iTunes & app store purchases.”
- Determine the Settings for In-App purchases and Deleting or Installing Apps
From here you can set “allow” or “don’t allow” for making in-app purchases, deleting apps and installing apps.
You can also require a password before allowing any of those actions, and you can set up each one individually. For this example, we’ll choose to disallow in-app purchases. Tap “in-app purchases.”
- Choose the Setting You Want
Choose “allow” or “don’t allow” for in-app purchases. Once you’re done, go back and either allow or don’t allow the others.
How to Set Parental Controls on iPhone 2024:Newshub360.net
Related Post
Credit :www.Newshub360.net


